Building your Site: Posts and Pages
To add content to your site, you can use posts or pages. To add functions to your site, you can use widgets and plugins. In this section, you will find brief explanations of these building blocks as well as helpful tips for how to best use them on your site.
What is a Post?
When you want to write content for your site, you have the option of creating both posts and pages. Posts will appear on the “Home” page of your site in chronological order, with the newest post appearing at the top of the page. By default, your most recent posts are the first thing that a viewer will see when visiting your site. They are a good place to post new information or announcements about your course, project, or club. They are also a good place to publish new discussion questions, reading responses, blog entries—or any information that will be less relevant to your viewers as your course, project, or club progresses. Remember that posts are displayed chronologically, so any content posted will be pushed down the screen by new content. If you would like certain content to remain static so that your viewers will always see it when they visit your site, then you might want to create that content as a Page (e.g., a course syllabus, a project description, or a club mission statement).
Writing a Post
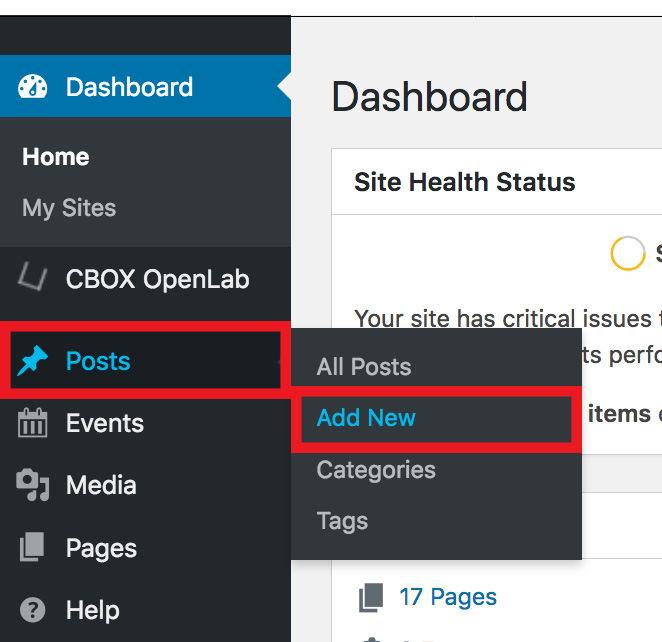
- From your site’s Dashboard, click on Posts > Add New in the left hand menu.
- Add a title and content to your post. You will notice that many of the formatting buttons such as bold or text alignment look similar to those in common word processing and email programs. You can type in the content box shown below, or paste text from another document.
- You can include images and documents in your post using the Add Media button just above the visual editor box. You can also find more detailed instructions for adding images and other media, and embedding video.
- To the right of the visual editor is the Publish box. When you’re ready for your post to be published on the site’s home page, click Publish. You’re done! You can now view your post on the site.
- If you would like to see how your post will appear on the site before you publish it, click the Preview button. You can also click Save Draft to save your post and continue working on it later without making it visible on the site.
- If you’d like, you can “stick” a post to the top of a site so it remains at the top even after you add new posts. In the Publish box, click the Edit link next to Visibility: Public (see below). Check the box, “Stick this post to the front page” and click OK to save.
- You can also change the privacy settings for a single post in the Visibility section. There are three options:
- Public is the default. Anyone who can view the site can see your post.
- Password Protected makes it available only to users who enter a password of your choosing.
- Private makes it accessible only to site administrators.
Click OK to save when you are done. Students should check with their professors before making a post password protected or private.
What is a Page?
Pages can have the same content as posts, but they are not published chronologically and the content on a page remains static (i.e., it doesn’t change). Your posts will appear chronologically on your “Home” page and your pages will appear as links on your “Home” page. These links will usually appear in the header menu on your site and/or in the right-side menu on your site. To view a page, viewers will need to click the link for the respective page.
Creating Pages on your Site
- To create a page on your site, go to your site Dashboard and click Pages > Add New in the left-hand menu.
- On the following screen, you will see a title line, a text box, and a formatting toolbar. Here you can enter a title for your page and the content that you would like to appear on your page. To modify your text (e.g., to change the font style, add a link, etc.), highlight the text that you want to change and click the appropriate button from the formatting toolbar. You can also add images, audio, or video to your page by clicking the icon next to Upload/Insert.
- Once you have finished adding content to your page, click Publish in the “Publish” section of the right-hand menu. If you would like to see how your page will look before you publish it, click Preview in the right-hand menu. Additionally, if you would like to continue working on your page and publish it at a later time, click Save Draft in the right-hand menu.
- You can also change or edit your page’s privacy settings by clicking Edit in the Visibility settings in the same right-hand menu. You can choose to make your page public, password protected, or private.